Search This Blog

Showing posts with label Culture. Show all posts

Friday, April 27, 2012

Guatemalan Worry Dolls

This week with my crafts club we made Guatemalan Worry Dolls. Worry dolls are given to children to help them deal with difficult times. They are stored in a special box or bag until nighttime. Then, just before going to sleep, children take out the worry dolls and tell one worry to each dolls. The dolls then spend the night under the children's pillows until going back in the box the next morning. Worry dolls are a lot like dream catchers. You can certainly buy them or you can make them yourself using pipe cleaners and yarn!

How to make your own worry dolls:

Materials: 2 or 3 wire twist-ties (or pipe-cleaners), 4 inches long; colored yarn or string; scraps of colored paper; scissors; glue; makers
 Step 1) For a bigger doll, use 3 pieces of pipe-cleaner. Twist two together, about an inch from the top. Keep the short ends together (for the head later) but separate the long ends (for the legs). 
Step 2) Wrap the third piece around the body for the arms. Make sure they are even lengths. Bend the hands and feet.
*NOTE* For a smaller doll, use only 2 pieces. Fold one in half and separate the ends. Wrap the second piece around the body to make the arms.
 Step 3) Knot a piece of yarn to the pipe-cleaners where they cross. With the loose end of the yarn, wrap it around the body and down one leg. Then wind the yarn back up the same leg. Do the other leg the same way. Then, wrap the arms in the same fashion. To finish, crisscross the yarn over the shoulders and under the armpits (my students couldn't stop laughing any time I said armpits... not sure why it's so funny but they were fun to watch). Cut the yarn and glue the end to the doll's back.
Step 4) Cut a colored paper rectangle larger than the head. Fold it in half to make a square and round out the edges with scissors. Glue the paper around the doll's head and draw a face. You can add hair if you want as well. This is a picture of dolls that my students made. Aren't they great?

Want to do more? During this activity we also practiced saying colors and body parts. You could also practice adjectives by having children present their dolls to the class as they describe their dolls. You could take this activity to the next level by have the children make the dolls interact with each other and have short conversations. Students could perform their "puppet show" in front of the class or other groups of friends.

Tuesday, April 10, 2012

Papel Picado

Papel picado is a very popular decoration in Spanish-speaking countries. This cut-paper (literally, pierced-paper) is used for birthdays, weddings, Day of the Dead, and Cinco de Mayo, among countless other holidays and celebrations. There are a couple of different ways to make this decoration but I just used scissors with my students. It's much easier than using a chisel, for example. My after-school club had a lot of fun and so did I! I've also done this project with middle schoolers and as a high school student myself. With the younger kids, I chose easier patterns or let the students make up their own pattern. The older students are more able to successfully complete the more intricate patterns, although I could still see frustration in some of my students' eyes. This is a fun activity but can be quite difficult, depending on the pattern you choose. 


 Step 1: Start with different colored tissue paper, a variety of patterns (downloadable from the internet - here's one example), glue or a staple or tape, scissors or an exacto knife.


 Step 2: For my students, they chose one piece of tissue paper, folded it in half, and taped the pattern to one side. You can also choose multiple pieces of tissue paper and staple them together to do more at once. We used scissors in my class but you can do more intricate patterns with an exacto knife or something similar. 


Step 3: Finish cutting out the pattern. The picture to the left is one I made using a sun pattern. You have to be careful when removing the pattern otherwise you'll have to tape part of your decoration back together like I did. The picture above is an example of some that my students made without using a pattern. This method is more like making a paper snowflake and is a lot quicker and sometimes less frustrating. All in all, we had lots of fun and I'll be doing this activity a lot with my future students! Even with a whole class, it's a pretty easy activity to do. This can be used as a project for culture activities like Day of the Dead; a way to practice listening to and following directions in Spanish; vocabulary practice like colors and shapes; the possibilities are endless! You can hang up the finished products or string them together and create beautiful, long pieces of artwork to hang across the ceiling or hallway!

Sunday, January 22, 2012

Mmm... paella

I had my first taste of paella on my honeymoon in Malaga, Spain. While I am not a fan of seafood, my husband LOVES it. And, since I love him, I'll allow him to get seafood every now and then. (Aren't I nice?) He ordered paella marisco (seafood paella) and with my first bite of the paella rice, I feel in love! Then I found out that there are different types of paella that have more than just seafood. Actually, the traditional version of paella has rabbit, chicken, and (land) snails. If you want to learn more about paella, check out this website. Basically, it is a traditional Spanish dish that has its roots in Valencia. Most of the ingredients in paella are pretty basic (chicken, shrimp, rice, veggies, etc...) but one thing that makes this dish so special is one of the spices... saffron. Saffron is the most expensive spice in the world but really elevates whatever dish in which it is used. I've had paella once since I've been back in the US, but it didn't measure up to what I had in Spain. So, I thought I'd try to make it myself! My husband and I love experimenting with new recipes and are pretty decent cooks. I don't think I'd call us chefs yet, but we're working our way up there.


We started by purchasing this paella pan from Williams and Sonoma. I could spend all day in that store but we had to get back to start cooking! It is important to use a paella pan, or at least a wide, shallow skillet to allow the rice to spread thinly.


Our next step was to find a recipe. After much research on foodnetwork.com, we finally decided to modify Tyler Florence's recipe a little bit.


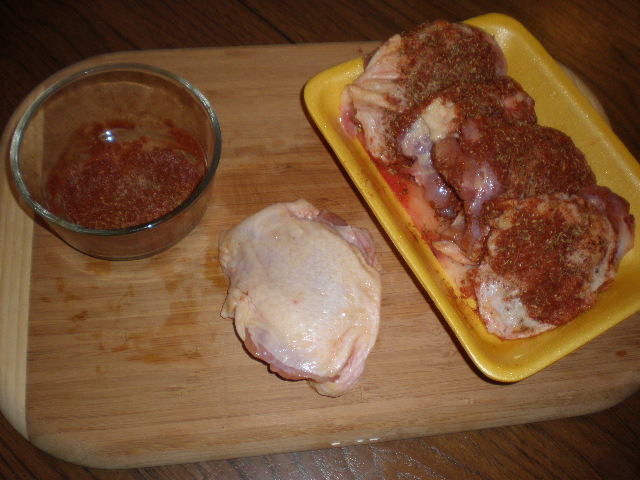
We started by seasoning the chicken because that needed to marinade for about an hour.

Then we chopped all the veggies (onion, garlic, red and green bell pepper).

Next, it was time to start cooking! First, saute the chorizo and sear the chicken, skin-side down in the paella pan. Set them on a cutting board once they're cooked because you won't need them again until later.

In the same pan, make a sofrito by sauteing the onion, garlic, and peppers. Then, add tomatoes and cook a little longer.

Fold in the rice and stir-fry it until the rice is a little toasted. Then, add chicken stock and stir every now and then so the rice absorbs the liquid evenly. 
Next, tuck the meat into the rice. Don't stir anymore because you want the rice to form a toasty bottom! (Add the shrimp after about 10 minutes, because it doesn't take as long to cook.) - although be careful not to burn the bottom. I struggle with this part. When the rice looks fluffy and moist, turn the heat up for 40 seconds until you can smell a nice brown bottom.  Finally, garnish with peas, lemon wedges, and parsley and enjoy! Yum! It was delicious and turned out to be a huge success. My brother, husband, and I all certainly enjoyed it!


While I don't think that I will ever make paella for my students, having the experience of actually making the paella myself will allow me to better explain just what exactly is this amazing dish. Culture is never touched on enough in classrooms (I am certainly guilty of skipping over it more than I should - I'm working on that, I promise!) but food is a great way to bring it back to the classroom. Reading stories, using play-dough to make it, drawing it... the possibilities are endless! My favorite food activity in a Spanish classroom when I was a student was to have a restaurant where students bring in Hispanic foods then pretend to be waiters and customers for a lesson. Lots of fun, lots of food, and best of all, lots of speaking Spanish!