Search This Blog

Showing posts with label Food. Show all posts

Saturday, May 5, 2012

Making Tamales

In my cooking class this past week, we made Mexican tamales. Now, I need to be perfectly honest with everyone. I've never actually eaten a tamale that I've enjoyed, mostly because of the corn dough in the middle of the corn husks. Also because I've never had an authentic tamale and really haven't tried too many in my life. However, when one of my co-workers mentioned that she used to make tamales all the time with her family and my students had been talking about tamales in previous classes, I decided to give it another try. Plus a rule in my class is that you have to take and least 2 bites of every food we cook but you don't have to finish it. My coworker gave me an authentic recipe that she used with her family and guess what? They were delicious :) I have extra corn husks so I'm excited to make some at home for my husband in the near future. Here's how you make it!


Mexican Tamales

1.     If using corn husks, soak them in enough warm water to completely cover for several hours or overnight to soften. Pat corn husks with paper towel to remove excess moisture. Otherwise you can just use aluminum foil. The corn husks are more fun though. 

2.   Combine 1 1/2 cups masa harina and 1 cup warm water. Mix well. Cover and let stand 20 minutes.
3.   Meanwhile, in a large saucepan, cook 1 chopped onion in 2 tbsp butter till onion is just tender.
4.   Blend in the 2 tbsp flour and 1/4 tsp salt. Then add 1 cup chicken broth. Cook and stir till mixture is thickened and bubbly.
5.   Stir in 1 1/2 cups diced chicken, 1/3 cup raisins, 1/3 cup toasted almonds, 1 tbsp vinegar, 1 tbsp parsley, and 1/2 tsp ground cinnamon. Set aside to cool slightly.
6.   In another small bowl, beat 1/2 cup shortening and 1/2 tsp salt until fluffy. Beat in masa harina mixture until well combined.


7.   Measure 3 tablespoons dough onto each tamale wrapper. With wet fingers, spread dough to form a rectangle.

 8.   Place about 2 tablespoons chicken-raisin filling, lengthwise, on each tamale rectangle.
9.   Tightly roll tamales jelly-roll style starting with the edge nearest filling.

10.Tie ends securely with strings of corn husk or string. Or you can fold ends under.
11.  Place the tamales on rack in a large steamer or electric skillet. Add water to just below the rack level. Cover and steam 40-45 minutes or until a tamale pulls away from its wrapper when gently unrolled. Serve immediately and enjoy! (Don’t eat the corn husk!)

Friday, April 13, 2012

Hot chocolate like you've never tasted

This is another recipe that I used with my after-school cooking club. Again, it was the first day so I don't have pictures but this is a delicious recipe. This hot chocolate is not like the swiss miss envelope packets at all. It is so much better than that and totally worth the effort. I got this recipe from my host family when I stayed in Peru during college.


Hot Chocolate (Peru)

Ingredients:

4 oz chocolate de taza, or semisweet chocolate, chopped
3 cups water
4 cloves
2 sticks cinnamon
1 can unsweetened evaporated milk
Sugar to taste
2 teaspoons vanilla extract
½ teaspoon nutmeg, grated
whipped cream (optional)
Oats (optional)

Preparation:
1.   Bring the water to boil with the cinnamon and cloves, for 10 minutes.
2.   Add the chopped chocolate, stirring until melted.
3.   Add evaporated milk, sugar to taste, nutmeg, and vanilla extract.
4.   Serve immediately with a dollop of whipped cream if desired, and a sprinkling of ground cinnamon or grated chocolate. You can also put oats in the hot chocolate to give it a little bit of texture. My host family from Peru taught me that :)

Colombian Coconut Cake

Here's another recipe from something I made with my Horizons class. We made this the first day so I forgot to take pictures. It was a lot of fun and very easy to make. I got this recipe from a friend whose boyfriend is Colombian.


Pastel de Macarena

Ingredients:

2 sticks butter (softened)
¾ can coconut cream
¼ cup vanilla yogurt
½ box vanilla wafers
1 cup hot chocolate
12 oz mini chocolate chips
½ bag shredded coconut

Preparation:

1.   Make hot chocolate and set aside to let cool.
2.   Beat 2 sticks of butter in a medium bowl.
3.   Add about 3/4 a can of coconut cream and 1/4 cup of yogurt. Beat this all together. Set the coconut mixture aside.
4.   Dip the vanilla wafers in the hot chocolate, then line the bottom of the pan with the soaked wafers.
5.   Spread a layer of the coconut mixture over the wafers.
6.   Cover the mixture with shredded coconut.
7.   Sprinkle chocolate chips over the coconut.
8.   Repeat steps 4-7 for as many layers as you would like.
9.   Put the finished cake in the refrigerator for about 10 minutes to let everything set up. Enjoy!

Fire alarms and fun

I had my first super embarrassing moment at school yesterday. My after school cooking club and I were making Mexican corn cookies in the teachers' kitchen. Something was (already - I swear it was already there) on the bottom of the oven and when I opened the door to check on the cookies... smoke started billowing out! One of the kids said, “It would be funny if the fire alarm went off right now.” Guess what happened 10 seconds later.... Yup, the fire alarm started screeching and the lights started flashing. Everyone in the school evacuated, I told the principal what happened, and then had to show the cops/firemen (who were fully dressed in their gear by the way, complete with axes) where the problem was and explain it. Highly embarrassing. Even though I wanted to cry (I didn’t, go me!) I tried to make light of the situation with the other staff members. That wasn’t too hard since they were busy cracking jokes and mocking me (in a friendly way). I think my reputation at this school after I leave will be “Remember when that first year Spanish teacher had the school evacuated because of something she was baking?” At least it’s a great story. Oh and on the upside? The cookies turned out perfect!

Mexican Corn Masa Cookies
 Step 1: Preheat the oven to 375 degrees. Combine 4 cups instant corn masa mix, 1 1/2 cups sugar, 1/2 teaspoon baking soda and 1/2 teaspoon salt in a large bowl.
Step 2: In another bowl, beat 1/2 cup + 2 tablespoons vegetable shortening and 1/2 butter together. (At room temperature)
Step 3: Beat dry ingredients into butter mixture with a wooden spoon until the mixture forms a firm but pliable dough. (I ended up not using all the dry mixture and mixing with my hands.) Work in 1 teaspoon vanilla extract.
 Step 4: Pinch off walnut-sized pieces of dough, shape into balls, and press onto ungreased baking sheet. Press 5-6 pumpkin seeds (I used sunflower seeds since I couldn't find pumpkin seeds in the store) in a petal form on each cookie. You can use a cinnamon candy as the center.
Step 5: Bake 10-13 minutes and enjoy! This is a picture of a cookie pre-baking time. I didn't get a picture afterwards because of all of the excitement from the fire alarm. It looked the same though, just a little more golden-brown. 

I've never had these before but I would make them again! Next time, I'll be sure to clean the oven before I turn it on.

Friday, April 6, 2012

Arroz con leche

I also made arroz con leche with my cooking class. It is a very popular Hispanic dessert that is enjoyed in most of the Spanish-speaking countries. This is the first time I've made this dish and I'm quite proud with how it turned out. The kids thought it was delicious too. There is also a popular children's song in Spanish about this delicious dish. Check that out here. (Yes the video is a little weird but the pictures help explain the lyrics if you don't understand the Spanish.)


 Step 1: Let 1 cup rice soak in 4 cups of water with ground cinnamon and ground cloves. It should soak for at least 1 hour.
 Step 2: Bring rice mixture to a boil. Let it boil for 10-12 minutes, stirring occasionally.
Step 3: While mixture is boiling, beat one egg in a bowl. Add one can sweetened condensed milk and one can evaporated milk. After 10-12 minutes, add the milk mixture and turn the heat down to medium. Continue at a soft boil, stirring occasionally, for about 20 minutes.
Step 4: Spoon into a bowl (or put in the fridge if you want to eat it cold). Top with dried fruit and cinnamon.
Step 5: Enjoy! This is a pretty rich dessert so you don't need a lot but it is delicious.

Peruvian Fried Rice?

In addition to a Spanish crafts after school club, I also have a cooking one. This week, we made arroz chaufa, which is Peruvian fried rice. There is a large Chinese population in Peru and so they have adopted a fusion of Peruvian food and Chinese food as part of their culture. Restaurants that serve this food are called Chifas and are super delicious. My students and I mixed a soy sauce and ginger with chicken, green bell peppers, red bell peppers, zucchini, carrots, broccoli, and rice to make a delicious meal. I got this recipe from my host family when I stayed in Peru for 5 weeks a couple of years ago. This is a dish that everyone will love. I was very impressed that all of my students pretty much cleared their plates... Even most of the vegetables were gone! That's more than I can say for my husband who enjoyed the leftovers :)


Step 1: Cut up 2 chicken breasts and cook them in a wok with peanut oil, soy sauce, and ginger. 
 Step 2:  Add in sliced green and red bell peppers, carrots, and zuchini.
Step 3: Add precooked broccoli and rice.
Step 4: Enjoy! It's super tasty :)

Monday, February 20, 2012

Ropa Vieja: old clothes or a tasty dish?

For my birthday last week, my husband took me to a delicious Cuban restaurant, Havana Grill. He knows how much I love my Latin food and this was a very nice, and very tasty, treat. There were so many delicious options that it was difficult to choose exactly which ones would be our dinner. However I decided on "Havana Roasted Pulled Pork" (Slow roasted pork, served with jalapeno mashed potatoes and roasted cream corn) and my husband chose "Ropa Vieja." He had a delectable dish of "choice flank steak simmered in a garlic, tomato, and bell pepper sauce until tender, served with white rice, black beans, & sweet plantains."


Ropa vieja... yum!

This dish is primarily Caribbean. I was telling my Honduran friend about this dish and he stared at me with a curious look on his face. He is a native speaker of Spanish while I learned my skills through my high school class. Knowing this, he asked me if I knew what "ropa vieja" meant. I laughed because I realized why he was looking at me so funny. In Spanish, "ropa vieja" literally means "old clothes." I explained to him that my husband did not eat a plate of old clothes and that it is in fact the real name of a delicious Cuban dish. He laughed too. I have heard a number of reasons as to why this dish is named the way it is. Wikipedia says "a man [was on his way] home for dinner. Being very poor, the man could not buy them enough food when they came. To remedy his situation, he went to his closet, gathered some old clothes (ropa vieja) and imbued them with his love. When he cooked the clothes, his love for his family turned them into a wonderful beef stew." Some food experts say that it is because the shredded beef resembles old rags. I prefer the first story but to each his own.

Sunday, January 22, 2012

Mmm... paella

I had my first taste of paella on my honeymoon in Malaga, Spain. While I am not a fan of seafood, my husband LOVES it. And, since I love him, I'll allow him to get seafood every now and then. (Aren't I nice?) He ordered paella marisco (seafood paella) and with my first bite of the paella rice, I feel in love! Then I found out that there are different types of paella that have more than just seafood. Actually, the traditional version of paella has rabbit, chicken, and (land) snails. If you want to learn more about paella, check out this website. Basically, it is a traditional Spanish dish that has its roots in Valencia. Most of the ingredients in paella are pretty basic (chicken, shrimp, rice, veggies, etc...) but one thing that makes this dish so special is one of the spices... saffron. Saffron is the most expensive spice in the world but really elevates whatever dish in which it is used. I've had paella once since I've been back in the US, but it didn't measure up to what I had in Spain. So, I thought I'd try to make it myself! My husband and I love experimenting with new recipes and are pretty decent cooks. I don't think I'd call us chefs yet, but we're working our way up there.


We started by purchasing this paella pan from Williams and Sonoma. I could spend all day in that store but we had to get back to start cooking! It is important to use a paella pan, or at least a wide, shallow skillet to allow the rice to spread thinly.


Our next step was to find a recipe. After much research on foodnetwork.com, we finally decided to modify Tyler Florence's recipe a little bit.


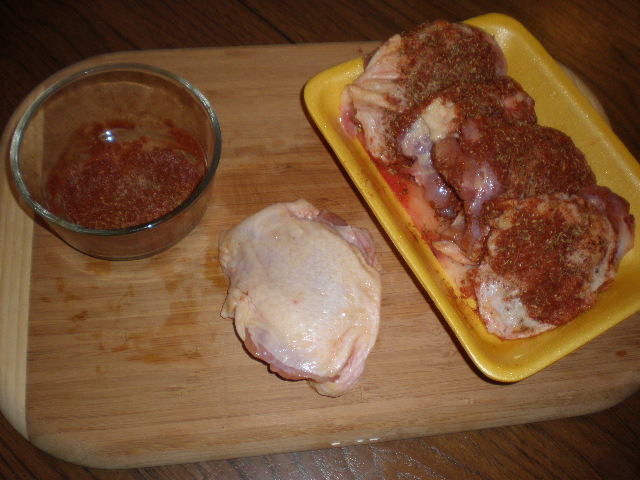
We started by seasoning the chicken because that needed to marinade for about an hour.

Then we chopped all the veggies (onion, garlic, red and green bell pepper).

Next, it was time to start cooking! First, saute the chorizo and sear the chicken, skin-side down in the paella pan. Set them on a cutting board once they're cooked because you won't need them again until later.

In the same pan, make a sofrito by sauteing the onion, garlic, and peppers. Then, add tomatoes and cook a little longer.

Fold in the rice and stir-fry it until the rice is a little toasted. Then, add chicken stock and stir every now and then so the rice absorbs the liquid evenly. 
Next, tuck the meat into the rice. Don't stir anymore because you want the rice to form a toasty bottom! (Add the shrimp after about 10 minutes, because it doesn't take as long to cook.) - although be careful not to burn the bottom. I struggle with this part. When the rice looks fluffy and moist, turn the heat up for 40 seconds until you can smell a nice brown bottom.  Finally, garnish with peas, lemon wedges, and parsley and enjoy! Yum! It was delicious and turned out to be a huge success. My brother, husband, and I all certainly enjoyed it!


While I don't think that I will ever make paella for my students, having the experience of actually making the paella myself will allow me to better explain just what exactly is this amazing dish. Culture is never touched on enough in classrooms (I am certainly guilty of skipping over it more than I should - I'm working on that, I promise!) but food is a great way to bring it back to the classroom. Reading stories, using play-dough to make it, drawing it... the possibilities are endless! My favorite food activity in a Spanish classroom when I was a student was to have a restaurant where students bring in Hispanic foods then pretend to be waiters and customers for a lesson. Lots of fun, lots of food, and best of all, lots of speaking Spanish!