Search This Blog

Showing posts with label Activities. Show all posts

Friday, September 26, 2014

SER/ESTAR/TENER

I've always taught my students ser and estar, but this is the first year I did it together. I also taught tener at the same time, pointing out the fact that although the verb means "to have" we use it like "to be" for age and "needs" (tener expressions). I introduced the concept (none of verbs were new to my 7th graders) and we practiced for about a week before the quiz. My students took the quiz and.... well let's just say that score is not going in the gradebook. I've never had a quiz go that poorly for so many people before so I reflected on how I taught the lesson and realized that this was one of the first times I didn't have a rhyme or song or actions to help my students remember. So, I went searching on the internet and found this. Because I teach tener with ser and estar, I added my own verse to the end. Here's the whole thing:

For how you feel or where you are, 
use the verb ESTAR.
For who you are or where you're from,
use SER, the other one.
For your age or what you "need,"
then use TENER, if you please!

After students wrote down the rhyme, we broke down the categories more specifically.
- Feel - temporary feeligns
- Where - location, location, location!
- Who - colors, adjectives, jobs
- From - where you grew up/were born
- Age - (self-explanatory)
- "Needs" - tener expressions like hunger, thirst, luck, hurry, etc...

They'll take another quiz next week. I hope it goes better!

Wednesday, September 3, 2014

Another new year...!

How is it that as a first year teacher I had time to write a blog, but it's taken me 2 years and the start of my 4th year teaching to get back to it? Wow, time sure does fly! I hope to be better about posting this year. It's my third year at the same school so I feel like I'm finally getting my feet under me. In fact, my introduction lesson I have now taught over 40 times! This lesson is a great way for the students to get to know me, for me to learn how to say their names (without messing up!), and to review vocabulary.

On the first day of class, I always start out by saying hola/buenos dias/buenas tardes, depending on the time of day. After a few introductory things (such as my name, how often Spanish meets, and what they need to have on their desk (nothing! for today), I do the following activities for a 40-minute class.

Introduction powerpoint
I choose 3-5 pictures of myself and put them on separate slides. Then, I describe each picture in Spanish and the students have to guess what I'm saying. I change the complexity of my sentences depending on the level of Spanish that I am teaching.
photo.JPG
For this picture I might say...
Esto es mi perro. Mi perro se llama Bo. Mi perro Bo es muy muy loco! Es blanco y cafe. (This is my dog. My dog's name is Bo. My dog Bo is really, really crazy! He's white and brown.)
For a higher group, I'll add in my details.
Esto es mi perro. Mi perro se llama Bo. Mi perro Bo es muy muy loco! Es blanco y tiene ojos y orejas cafes. Le gusta correr y jugar en el parque. Despues de correr, le gusta dormir en mi cama! Pero, es muy lindo, por eso no puedo decir no.(This is my dog. My dog's name is Bo. My dog Bo is really, really crazy! He's white and has brown eyes and ears. He likes to run and play in the park. After running, he likes to sleep in my bed! But, he's so cute, so I can't say no.)
No matter the level, I am always pointing to the picture and acting out verbs.

Name ball toss
Ball tosses are one of my favorite activities because it gets everybody talking. Plus, if you have someone new to the language, they can copy what the other people are saying. I start by asking how to say "what is your name" and "my name is" in the target language, and write the phrases on the board. I have the class repeat after me and make sure they know how to say it. Next, everybody stands up.
Then you can do the ball toss one of two ways:
1. The teacher throws the ball to a student and asks the question. The student answers, throws the ball back, and sits down. The teacher continues to throw to individual students until everyone has had a turn.
2. The teacher throws the ball to a student and asks the question. The student answers, then throws the ball to another student, and asks the question. After asking the question, the first student sits down. The second student gives an answer, and tosses to a new student.


Sometimes I'll do it both ways and challenge them to do #2 faster than we did #1.

Review game
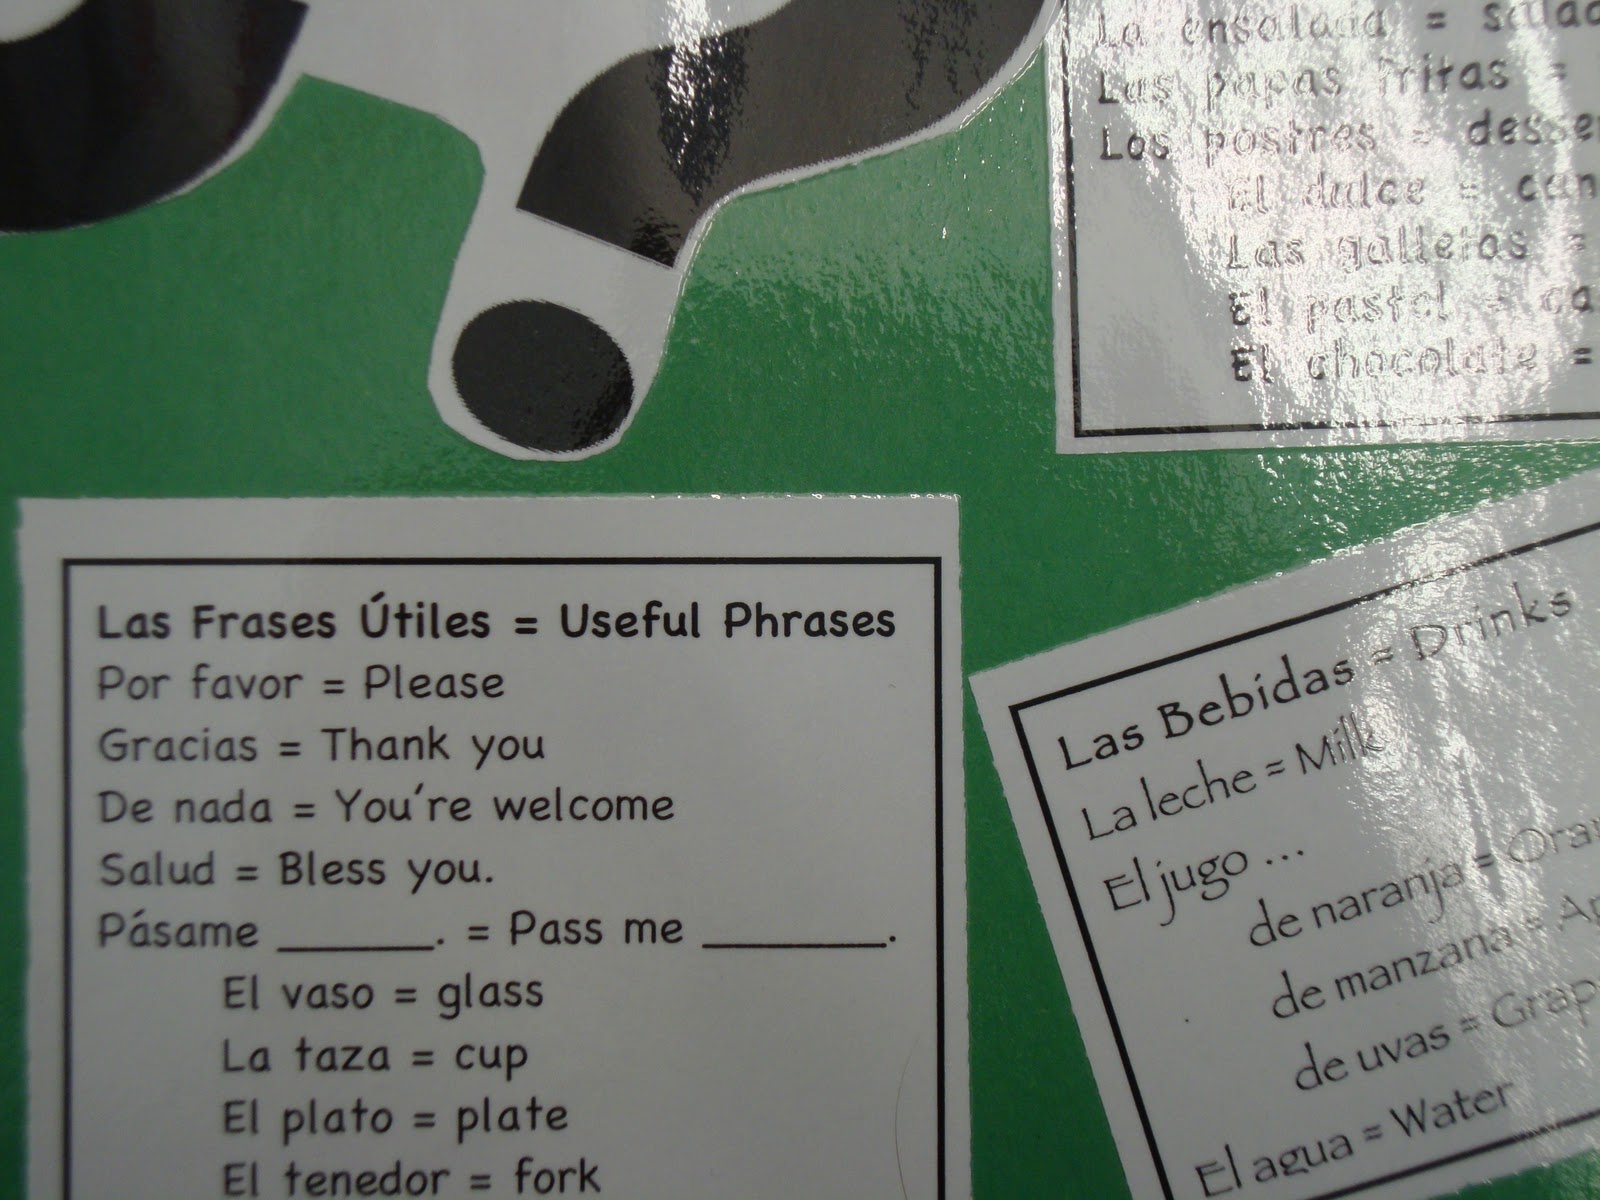
For classes that have had at least one year of Spanish, I like to start the first day with a low-pressure review game to see how much they remember. I separate them into groups (people they are sitting by, no more than 5 in a group) and give each group a whiteboard and expo marker. (Paper and pen would work just fine.) I give a category, such as colores, and students have to work together to write down as many Spanish words in that category as possible. Spelling doesn't count and they can't use notes. I put a 2 minute timer on the board and when the timer is up, students go group by group and say one word on their list. If someone says a word on your list, you erase the word so there are no repeats. Continue the game for the rest of class.

Friday, April 27, 2012

Guatemalan Worry Dolls

This week with my crafts club we made Guatemalan Worry Dolls. Worry dolls are given to children to help them deal with difficult times. They are stored in a special box or bag until nighttime. Then, just before going to sleep, children take out the worry dolls and tell one worry to each dolls. The dolls then spend the night under the children's pillows until going back in the box the next morning. Worry dolls are a lot like dream catchers. You can certainly buy them or you can make them yourself using pipe cleaners and yarn!

How to make your own worry dolls:

Materials: 2 or 3 wire twist-ties (or pipe-cleaners), 4 inches long; colored yarn or string; scraps of colored paper; scissors; glue; makers
 Step 1) For a bigger doll, use 3 pieces of pipe-cleaner. Twist two together, about an inch from the top. Keep the short ends together (for the head later) but separate the long ends (for the legs). 
Step 2) Wrap the third piece around the body for the arms. Make sure they are even lengths. Bend the hands and feet.
*NOTE* For a smaller doll, use only 2 pieces. Fold one in half and separate the ends. Wrap the second piece around the body to make the arms.
 Step 3) Knot a piece of yarn to the pipe-cleaners where they cross. With the loose end of the yarn, wrap it around the body and down one leg. Then wind the yarn back up the same leg. Do the other leg the same way. Then, wrap the arms in the same fashion. To finish, crisscross the yarn over the shoulders and under the armpits (my students couldn't stop laughing any time I said armpits... not sure why it's so funny but they were fun to watch). Cut the yarn and glue the end to the doll's back.
Step 4) Cut a colored paper rectangle larger than the head. Fold it in half to make a square and round out the edges with scissors. Glue the paper around the doll's head and draw a face. You can add hair if you want as well. This is a picture of dolls that my students made. Aren't they great?

Want to do more? During this activity we also practiced saying colors and body parts. You could also practice adjectives by having children present their dolls to the class as they describe their dolls. You could take this activity to the next level by have the children make the dolls interact with each other and have short conversations. Students could perform their "puppet show" in front of the class or other groups of friends.

Tuesday, April 17, 2012

Weaving with straws

When I went to Peru a few years ago, I went as part of a volunteer group to promote awareness about the weaving culture. My volunteer group consisted of 15 undergraduate students and 1 professor. While we all spoke Spanish in the group, only our professor had any previous knowledge about weaving. We worked with the Cusco Center of Textiles and met a lot of incredible people. I had such an amazing time learning how to weave and communicating and connecting with my weaving mentor. We learned all about the weaving process; from shearing the animals to washing the wool (this process sent me to the emergency eye doctor after some detergent scratched my cornea - I had to wear an eye patch for 3 days!). We also learned how to dye the wool using natural products like leaves, berries, and sticks. Finally, we learned how to spin the wool to make it nice and fine for weaving. Then came actually learning how to weave, which was very difficult, but a lot of fun. In the end, my peers and I made bracelets, belts, hats, and purses. We felt very accomplished. I can't imagine that being my lifestyle though and spending every day of my life weaving to survive. The weavers were very proud of their work and you could see it in their lit-up eyes as they spoke about it. My peers and I were very impressed with their creations of ponchos, blankets, place mats, and table-runners, just to name a few.

I've been trying to figure out a way to share this experience with my classes. There wasn't room in the curriculum this year to add in a full unit and I wasn't sure what I'd even do. So, instead I just shared this experience with my Spanish crafts after-school club. I showed them my weavings and balls of yarn and then we did our own weaving project that I found in a Spanish crafts book. The weaving project went... okay. I didn't test it out ahead of time (fatal mistake, I should have known better - my mom would be disappointed especially since I helped her test out so many experiments and activities ahead of time for her class) so I was trying to figure it out as we went along. That meant that I didn't have the answers for my students so they became frustrated which made me more frustrated which was just a vicious circle. After thinking about it more last night and this morning, I have come up with ways to improve this project for next time. It still needs improvement because this new process isn't perfect either. However, every day is a learning experience, right? Here's the process, with updated directions.


Materials: Yarn, ruler (or measuring tape), straws, scissors

Step 1: Cut 2 equal strings about 30 inches each. (2 for a bracelet, 4 for a belt)
Step 2: Cut 1/2 inch off the top of each straw and feed one string through each tiny piece of straw.
 Step 3: Thread both parts of the string through the long part of the straw. LOOSELY knot the ends of the string together. (You will be untying this later.)
 Step 4: Start weaving! Grab the end of the skein of yarn and tie a know around the bottom of one of the straws. Wrap the yarn around one straw, then drop it through the middle, then wrap around the other straw. Go back and forth, making sure everything stays tight together. When you fill up the straws, gently push the woven part off the bottom of the straw and continue weaving.
Step 5: When your project looks long enough, cut the yarn from the skein and carefully knot the yarn to the straw. Then, cut the little pieces of straw off the yarn. Next, slowly slide the straws out from the yarn.


 Step 6: Untie the loose knotted end of your bracelet and then tie the two ends together. Admire the beauty of the project you just created!

Monday, April 16, 2012

Online pop-up books

I was having difficulties trying to come up with a fun and different way to introduce vocabulary to my students. I've read books, although most times those don't quite align with what I want to teach. In those cases, I've created my own "books" using power point and prezi (check out this post about prezi). I've shown little video clips and made my own (using xtranormal... read this post for more information). I've shown big, printed-off clip-art pictures and matched the pictures to labels. I've used props, like classroom objects or stuffed animals, and had the kids pass the objects around the class. I've done all these ways many times before during this year and I wanted something new for my 3rd graders unit on school subjects. I wanted something different but didn't know what to do...


Luckily, the technology person at my school just showed me this awesome new website a few weeks ago. It's this awesome website called Zoo Burst that allows you to make online pop-up books! It's different, it's fun, and it's easy to make! You can sign up for a free account (which I did) which has plenty of options for characters, backgrounds, and extra props. If you pay for an account (which the technology person did) then it also comes with a voice feature. I think if I worked with students that had and brought their laptops with them to every class, paying for this service would be totally worth it. I can just imagine students creating their own children's story and recording themselves telling the story. What a great oral assessment! However, my students don't have their own laptops, so I just signed up for the free version. It's very simple to create the scenes; you can upload your own pictures or use their clipart for characters, props, and background. Each character can say whatever you want it to, and there is also a narration caption for the page itself. There is a limit of 10 pages (may be more for the paid version, I'm not sure) and I found that to be plenty. Here is my example.


You're probably wondering what my students thought. Well, they loved it! They smiled and giggled every time a new character popped up and even started reading some of the words themselves. It made for a fun and interactive lesson. We read it through once while I asked them questions in Spanish about the content of the book (Do you use a calculator in math? Do you run in music class?). The second time reading, I asked them who taught each subject and gave ridiculous examples to help them understand what I was asking. All in all, it was a very successful and engaging day.

Thursday, April 12, 2012

"Making the Most With What You've Got"

While reading this season's issue of One Day (TFA's alum magazine), I came across a really fantastic article called "Ed Tech 101: Making the Most With What You've Got" by Lewis Leiboh. One of the reasons I like this article so much is that it doesn't just name different ways to use technology in the classroom; it not only explains how to use these tools and gives examples, but also says what you need to be successful.

The first part of the article "Skype's the Limit" talks about different ways to use video chat. Leiboh suggests video chatting with "the author of a book... an expert scientist... a classroom from another community or country... a friend or professor... join a college class." I bolded my favorite because I've had this idea before. I just don't know where to get started. He suggests going to http://education.skype.com/ for project ideas. I did a little searching and found tons of people reaching out! This is a great way to get started with connections. I don't think I'll do anything this year but I look forward to incorporating Skype in my future classrooms. My eventual goal is to establish a relationship with one or two teachers and maintain that relationship throughout the years. That way, our students are always receiving this great experience and the other teacher(s) and I are perfecting the project each year. In addition to a laptops with webcam (or perhaps ipads) and speakers, a projector, and a videochat service that Leiboh recommends using, I would also suggest an activity of some sort so that the kids have an idea of what they should be doing while talking. This will help deter any awkward silences that may arise if you just want the kids to talk about whatever. As relationships and language skills develop, I think it'd be a great idea to just have conversations every now and then, and have the students write about what they said after the conversations.

The second part of the article is "Get Your Head in the Cloud." This one talks a lot about using class websites and eliminating the use of paper. This not only helps absent students and families stay in touch but also allows students to go back and review something if they need a little extra support. Leiboh suggests using "tools like Google Sites... [and] edmodo.com [which is] a private classroom social network."I don't really have experience with this and don't have the time with my 27-minute elementary classes, but think it is a great idea for a high school or middle school, especially if there is a 1-1 laptop ratio.

The last part of the article "Go Island Hopping" I love, mostly because I love stations. And I love how Leiboh calls them islands instead of stations... it's just so much more whimsical. I struggle with stations in my short time period, but have still made it work. Leiboh has a whole week of lesson plans for stations that goes as follows:

Monday: Whole group lesson, no islands
Tuesday-Thursday: 3 stations=1 station/day - the stations are 1) "instruction island" with is a small group with the teacher; 2) "independence island" which is 2 smaller groups for independent practice exercises and 3) "study island" where students use online tools at their own pace to master the content. You could change the study island sessions to include any online tool that you want, not just Leiboh's suggestion.
Friday: Wrap-up and quiz

He doesn't use the islands every week but it does break it up. Other ideas for islands include "watch instructional videos, practice fluency by having students record themselves reading out loud [and] complete group activities using a SmartBoard." I think these are all great ideas and there are so many more great ideas out there as well. This can be adapted for any age or grade level. Maybe one of the islands could even be FaceTime with another class and combine the first and third part of this article!

Tuesday, April 10, 2012

Papel Picado

Papel picado is a very popular decoration in Spanish-speaking countries. This cut-paper (literally, pierced-paper) is used for birthdays, weddings, Day of the Dead, and Cinco de Mayo, among countless other holidays and celebrations. There are a couple of different ways to make this decoration but I just used scissors with my students. It's much easier than using a chisel, for example. My after-school club had a lot of fun and so did I! I've also done this project with middle schoolers and as a high school student myself. With the younger kids, I chose easier patterns or let the students make up their own pattern. The older students are more able to successfully complete the more intricate patterns, although I could still see frustration in some of my students' eyes. This is a fun activity but can be quite difficult, depending on the pattern you choose. 


 Step 1: Start with different colored tissue paper, a variety of patterns (downloadable from the internet - here's one example), glue or a staple or tape, scissors or an exacto knife.


 Step 2: For my students, they chose one piece of tissue paper, folded it in half, and taped the pattern to one side. You can also choose multiple pieces of tissue paper and staple them together to do more at once. We used scissors in my class but you can do more intricate patterns with an exacto knife or something similar. 


Step 3: Finish cutting out the pattern. The picture to the left is one I made using a sun pattern. You have to be careful when removing the pattern otherwise you'll have to tape part of your decoration back together like I did. The picture above is an example of some that my students made without using a pattern. This method is more like making a paper snowflake and is a lot quicker and sometimes less frustrating. All in all, we had lots of fun and I'll be doing this activity a lot with my future students! Even with a whole class, it's a pretty easy activity to do. This can be used as a project for culture activities like Day of the Dead; a way to practice listening to and following directions in Spanish; vocabulary practice like colors and shapes; the possibilities are endless! You can hang up the finished products or string them together and create beautiful, long pieces of artwork to hang across the ceiling or hallway!

Friday, April 6, 2012

Arroz con leche

I also made arroz con leche with my cooking class. It is a very popular Hispanic dessert that is enjoyed in most of the Spanish-speaking countries. This is the first time I've made this dish and I'm quite proud with how it turned out. The kids thought it was delicious too. There is also a popular children's song in Spanish about this delicious dish. Check that out here. (Yes the video is a little weird but the pictures help explain the lyrics if you don't understand the Spanish.)


 Step 1: Let 1 cup rice soak in 4 cups of water with ground cinnamon and ground cloves. It should soak for at least 1 hour.
 Step 2: Bring rice mixture to a boil. Let it boil for 10-12 minutes, stirring occasionally.
Step 3: While mixture is boiling, beat one egg in a bowl. Add one can sweetened condensed milk and one can evaporated milk. After 10-12 minutes, add the milk mixture and turn the heat down to medium. Continue at a soft boil, stirring occasionally, for about 20 minutes.
Step 4: Spoon into a bowl (or put in the fridge if you want to eat it cold). Top with dried fruit and cinnamon.
Step 5: Enjoy! This is a pretty rich dessert so you don't need a lot but it is delicious.

Peruvian Fried Rice?

In addition to a Spanish crafts after school club, I also have a cooking one. This week, we made arroz chaufa, which is Peruvian fried rice. There is a large Chinese population in Peru and so they have adopted a fusion of Peruvian food and Chinese food as part of their culture. Restaurants that serve this food are called Chifas and are super delicious. My students and I mixed a soy sauce and ginger with chicken, green bell peppers, red bell peppers, zucchini, carrots, broccoli, and rice to make a delicious meal. I got this recipe from my host family when I stayed in Peru for 5 weeks a couple of years ago. This is a dish that everyone will love. I was very impressed that all of my students pretty much cleared their plates... Even most of the vegetables were gone! That's more than I can say for my husband who enjoyed the leftovers :)


Step 1: Cut up 2 chicken breasts and cook them in a wok with peanut oil, soy sauce, and ginger. 
 Step 2:  Add in sliced green and red bell peppers, carrots, and zuchini.
Step 3: Add precooked broccoli and rice.
Step 4: Enjoy! It's super tasty :)

Tuesday, April 3, 2012

Making Cascarones

I've started two after school clubs for the spring session at my school. The first is called Spanish Crafts and the second is called Cooking in the Spanish Kitchen. Both classes are pretty small, 5 and 6 students respectively. The small class size is actually really nice and it makes it much more relaxing at the end of the day. In celebration of holy week, my Spanish crafts class made cascarones, confetti-filled eggs, yesterday. Then in true traditional fashion, we smashed the eggs on each other's heads outside. Lots of fun!


 The supplies... empty, washed eggshells cracked from the top, not the side; glue; markers; and tissue paper that is cut into confetti and also glued on top to cover the holes.
 Step 1... decorate! We used markers but you could use paint, glue/glitter, etc. You can do a random design, draw a face, make the egg an M&M, basically anything you want!
 Then, fill the egg with confetti. You could also do small toys or candy inside, but I feel like that would be more painful during the smashing process.
Finally, cover the egg with tissue paper, let it dry, and smash it on someone's head! Lots of fun! We used chicken eggshells and preserved duck eggshells... in the future I would stay away from preserved duck eggshells because those seemed to be harder to crack and actually hurt a little bit. Found that out that out the hard way. Whoops.


Friday, March 16, 2012

"Sra. Zhang... I sprained my good wrist..."

That was what one of my students walked into class telling me today. Now, this is not the first sprain, or even broken, limb that has plagued my classroom. To date, I've had 3 students on crutches, 3 in casts, and 4 in some sort of brace. That's actually not too bad considering I have 300 students. Most of the time, they're healed up pretty quickly too. However, today was the first time that a student has been unable to write because of the injury, which caused me slight panic at first, until I came up with a great alternative for her.


The activity was to create flashcards for different body parts. I provided a template with the Spanish word. The students needed to cut out each card, and draw the body part on the back. No English allowed! Here's my example from class.


Now, my dear friend wasn't able to use scissors and could barely hold a pencil. So I grabbed the big picture cards and word labels and had her match them up on the carpet in the middle of the room. This way, she was still matching pictures to words, but didn't have to do the work herself.


Since it's faster to just match pictures/words than actually draw out the body parts, she finished quickly. So the next task I gave her was to create a body out of words. She had to order to word labels from head to toe and lay them out on the carpet. She did a great job!


These are great alternatives for any student who has trouble with fine motor skills. While it is important to practice fine motor skills in all classes, sometimes that focus can take away from learning content. So why should someone sit there and be frustrated with HOW to do activity when s/he could be getting the same practice with the content but not be frustrated with HOW to do the activity? My student couldn't write, but was still able to practice the same content, in practically the same way, as all of her classmates. It just took a little extra thinking on my part. She even got extra practice since she was able to finish more quickly!

Wednesday, March 14, 2012

Spanish is over already?

You know what one of my favorite things to hear from my students is? The phrase "Spanish is over already? That was so fast!" Times flies when you're having fun so I love it when my kids think that Spanish class went by quickly. I must have heard at least half of my 4th grade class say that today, and for good reason. We got a lot done, in a short amount of time. It was fun, it was entertaining, and it was all Spanish! I don't think I spoke a word of English the entire time! This is what we did:


1. Students enter and right away we sing the "Hola, hola" song. 
2. Students take turns asking each other the questions of the day and report the answers back to me.
3. We stand up and act out 8 different sports that we learned yesterday as we say the words and look at pictures on the board.
4. We sit down and students put labels on the pictures.
5. We do a ball toss where one students asks (in Spanish) "What sport do you play?" Then s/he throws the ball and the catcher answers "I play ..." This continues until everyone has had a turn.
6. Then we sit on the rug and watch a quick prezi about different ways to move.
7. Next I call out different ways to move and switch quickly from one way to another as students stand and act them out.
8. After that, students return to their seats and give me a list (in Spanish) of the words we just learned.
9. Then, students take turns asking each other which ways they like to move (¿Qué te gusta hacer? Me gusta ...)
10. Then we graph a few of the student responses and see which was the most popular.
11. Finally, we pack up and sing our good bye song.


All in 25 minutes! Lots of moving, lots of singing, lots of Spanish, lots of FUN. It was a great lesson. I love lessons like that :)

Tuesday, February 21, 2012

The monster eats everything!

This post isn't about anything that I recently taught. In fact, this post is about a lesson I taught way back in October... around Halloween. But really, it's about a technology tool that I used in that lesson. My third graders learned all about monsters and their facial features during the month of October. For the final project, they had to create their own monster, write descriptive sentences about their monster, and present it to the class. All the final products when into a class book which I bound and put in our classroom library. The students LOVE seeing their work in book form and LOVE to read books by other classes. Facial features were a brand new topic to my third graders. They had already had words for eyes and nose, but didn't know how to say eyebrows, teeth, etc. I wanted a fun way to introduce these new vocabulary words without just using flashcards. One thing that I learned both from my professor and Helena Curtain is that stories with lots of pictures are a great way to introduce to new vocabulary and engage your class. I couldn't find a story that taught exactly what I wanted my kids to learn, so I wrote my own! Instead of doing a simple word document or power point to create my pages, I decided to create a prezi. (I'll provide the link to see my prezi at the end after explaining what prezi is all about.)


Prezis ("The Zooming Presentation[s]") are basically the new form of powerpoint. They allow you to zoom in and out, view at different angles, and just make power points that much more fun. My mother (who used to be a middle school science teacher and is now principal of that school - Go Mom!) taught me this tool and I have used it for so many slideshows, presentations, and my own stories since then. Prezi is great because it allows you to make the presentation so much more fun and engaging than just a regular powerpoint. It is also super simple to use. There are lots of tutorials on the website that teach you all sorts of cool tricks to make your presentation even cooler. The best part? It's free! Now, you can choose to pay for an option that allows you to do more (Check out the different options here) but I have found the free version to be exactly what I need. I guess the next option up is also free for students and teachers, but I haven't explored that yet. If someone does, please let me know what you think!


Since I teach elementary school, I, as the teacher, am typically the only one creating presentations. However, this would be a great tool for students to use as they get older. Like I've said, it's just like power point... only way cooler. There are some high school teachers in my district who use it with their students, and from what I've heard, the students are more animated about creating slideshows using prezi than just power point. 


Finally... as promised... my prezi about monsters! Enjoy!

Saturday, February 18, 2012

Go straight, turn left, turn left, STOP!

I am the type of teacher who loves to plan unit by unit, attempt to do the whole backwards design thing, and always have lessons planned out at least a week in advance. This has worked out pretty well for me so far this year but this week I could just not figure out what I wanted to do with my 4th graders. We're just finishing up a unit called "Around Town" and their final product was to create a drawing and describe it, talking about what they wanted to be when they grew up. To take this unit one step further, the curriculum introduces the idea of giving directions to get around town and uses the buildings where the jobs work. I just could not figure out how I wanted to teach the directions in a way that was fun and engaging. I succumbed to google searches to see if any other elementary teacher had posted lesson ideas for this topic but was out of luck. One morning this week when I was in a panic about not knowing what to teach in 3 hours, an idea sprung to my head.... an obstacle course! This is by no means an original idea... it's actually something I did when I was a Resident Adviser at the University of Michigan. There, it was a trust activity as one person told their blindfolded partner how to safely make it through an obstacle course. I figured, why not do this and give directions in Spanish? So, I borrowed domes from the gym teachers, set up 3 courses out in the halls, and drew up little "cheat" sheets for the students to look at in case they forgot their right from their left. 

 The materials: cut-up towels for blindfolds, domes, black masking tape on the floor, and the "cheat" sheet.
 The course in the hall. Students started at one black line and had to make it to the other without touching a dome.
Me trying to be artistic with my camera :) I thought it looked cool, especially with the reflection on the floor. 

Once the students arrived in class, I broke them up into groups of 2. Then we went out to the hall. One partner received a blindfold and the other received a cheat sheet. I decided to do 3 obstacle courses so that more groups could go at once. One group started on each course, and when they were halfway through, another group started. Once the groups finished, they switched roles and started over. The students were so excited about this activity and were speaking so much Spanish! For coming up with this activity right before class, I'm pretty proud of how it turned out :) Don't get me wrong, planning ahead is ALWAYS the better way to go. However, sometimes our best ideas spring to mind when we are under pressure. :) 

Sunday, January 22, 2012

Mmm... paella

I had my first taste of paella on my honeymoon in Malaga, Spain. While I am not a fan of seafood, my husband LOVES it. And, since I love him, I'll allow him to get seafood every now and then. (Aren't I nice?) He ordered paella marisco (seafood paella) and with my first bite of the paella rice, I feel in love! Then I found out that there are different types of paella that have more than just seafood. Actually, the traditional version of paella has rabbit, chicken, and (land) snails. If you want to learn more about paella, check out this website. Basically, it is a traditional Spanish dish that has its roots in Valencia. Most of the ingredients in paella are pretty basic (chicken, shrimp, rice, veggies, etc...) but one thing that makes this dish so special is one of the spices... saffron. Saffron is the most expensive spice in the world but really elevates whatever dish in which it is used. I've had paella once since I've been back in the US, but it didn't measure up to what I had in Spain. So, I thought I'd try to make it myself! My husband and I love experimenting with new recipes and are pretty decent cooks. I don't think I'd call us chefs yet, but we're working our way up there.


We started by purchasing this paella pan from Williams and Sonoma. I could spend all day in that store but we had to get back to start cooking! It is important to use a paella pan, or at least a wide, shallow skillet to allow the rice to spread thinly.


Our next step was to find a recipe. After much research on foodnetwork.com, we finally decided to modify Tyler Florence's recipe a little bit.


We started by seasoning the chicken because that needed to marinade for about an hour.

Then we chopped all the veggies (onion, garlic, red and green bell pepper).

Next, it was time to start cooking! First, saute the chorizo and sear the chicken, skin-side down in the paella pan. Set them on a cutting board once they're cooked because you won't need them again until later.

In the same pan, make a sofrito by sauteing the onion, garlic, and peppers. Then, add tomatoes and cook a little longer.

Fold in the rice and stir-fry it until the rice is a little toasted. Then, add chicken stock and stir every now and then so the rice absorbs the liquid evenly. 
Next, tuck the meat into the rice. Don't stir anymore because you want the rice to form a toasty bottom! (Add the shrimp after about 10 minutes, because it doesn't take as long to cook.) - although be careful not to burn the bottom. I struggle with this part. When the rice looks fluffy and moist, turn the heat up for 40 seconds until you can smell a nice brown bottom.  Finally, garnish with peas, lemon wedges, and parsley and enjoy! Yum! It was delicious and turned out to be a huge success. My brother, husband, and I all certainly enjoyed it!


While I don't think that I will ever make paella for my students, having the experience of actually making the paella myself will allow me to better explain just what exactly is this amazing dish. Culture is never touched on enough in classrooms (I am certainly guilty of skipping over it more than I should - I'm working on that, I promise!) but food is a great way to bring it back to the classroom. Reading stories, using play-dough to make it, drawing it... the possibilities are endless! My favorite food activity in a Spanish classroom when I was a student was to have a restaurant where students bring in Hispanic foods then pretend to be waiters and customers for a lesson. Lots of fun, lots of food, and best of all, lots of speaking Spanish!


Friday, January 20, 2012

El club del almuerzo

Next week, I am starting el club del almuerzo (a lunch club). I got the idea from the nandu listserv. (An email group all about world languages in the elementary/middle school grades. This listserv really is quite fantastic and I strongly encourage everyone to join, even if you're high school! It won't always apply to older grades, but still is very useful. Instructions for joining are here.) I’m going to announce the lunch club in class next week, and then one day a week I will dine with each grade; 3rd on Wednesdays, 4th on Thursdays, and 5th on Fridays. I want to give my students who are excelling more of a challenge. I definitely still struggle with differentiation inside the classroom (that's a whole other post) but I figure this is a way for me to work with the upper kids, since I feel they aren't as challenged during class. The goal of el club del almuerzo is to speak as much Spanish as possible during lunch. I’ve created placemats with key phrases that will help. Check out these snapshots.


A sample of a bunch of placemats.
 Useful question words. 
 Phrases/words for lunch.
 Some of the food (some they [should] already know but probably have forgotten).


 These last three pictures are of the back of the placemats. Just more useful phrases and conversation topics.


Some other ideas that people on nandu had were playing games in Spanish, listening to Spanish music, and every now and then, eating Hispanic foods. I’m very excited to try this, but also very nervous. I’m also going to have a reward system to encourage speaking in Spanish. Let's face it, I'm nervous that the kids are just going to speak English and not even try the new words. But, kids can do more than we give them credit for so hopefully they'll prove me wrong! Every now and then when I "catch" them speaking Spanish, I’ll give them a sticker that they can store on their placemat. After an undetermined amount of stickers, they’ll get a small prize like a Spanish book or pencil. Any thoughts/feedback/concerns on this idea would be greatly appreciated! I'll post next week and let you know how it goes!